
This page will show you how to create your website or set up a blog with WordPress step by step for people who want to start their online business. What you’re going to need are two essentials, a domain, and web hosting. A domain is essentially your .com domain name and web hosting is just like a computer where all of your website files are stored so that your website visitors can access it 24/7.
After we cover this, we will move on to create digital or physical e-commerce store websites or even a website with the membership function.
First, we’ll get a domain hosting, then we will install a website and design.Thirdly, we will set up and configure the basic website functionality and then finally, I’ll come back and show you how to set up the rest of the website.
Get A Domain And Hosting.
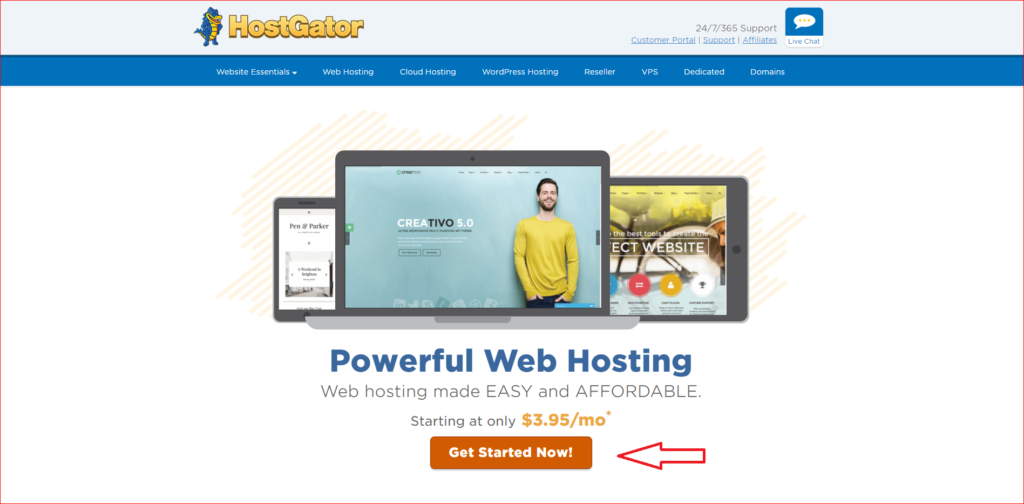
The place where I get my domain and hosting is hostgator.com (HOSTGATOR). It is one of the world’s most popular and well-respected hosting companies and I’ve been using them for all of my websites and my e-commerce stores, as well.
They’ve offered great support as you can see here, 24/7 support line, a toll-free number. In a nutshell, they’re great to work with and the service just works. So, now click on the web hosting section.
You’ll see that you’re presented with three plans. These three differ in very slight ways. The business plan has a free private SSL and toll-free number-something we don’t need. The “Hatchling” and “Baby”, actually very similar, except the “Hatchling” actually allows you to host a single domain, whereas the “baby” allows you to host an unlimited number of domains. Now, for our purposes, most of you out there will just need a single domain, so the “hatchling” plan will suffice.
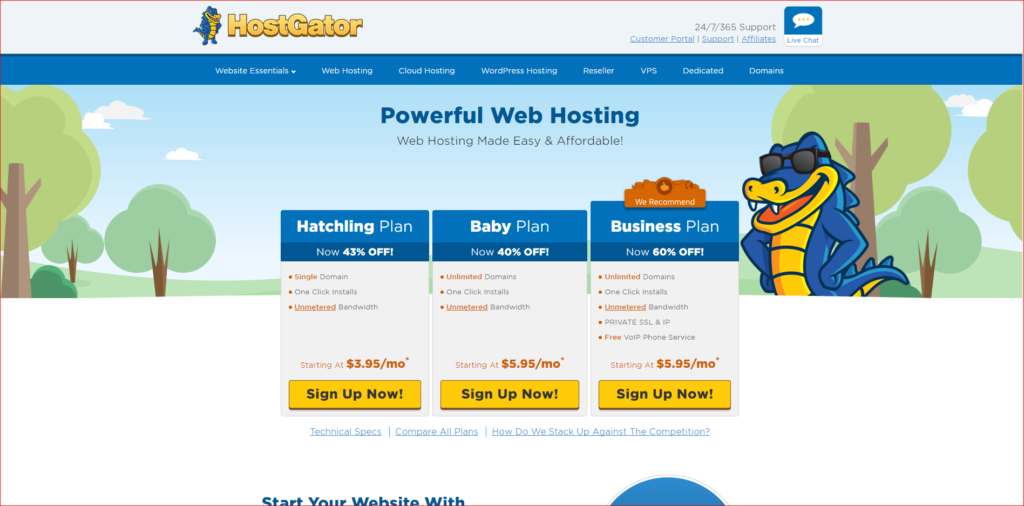
Of course, you can always upgrade the plan, if you are going to add more .com domains to your account for whatever reason. But at this moment, the “Hatchling” plan will suffice and it’s also the cheapest one. So, click on the ‘Sign Up Now’ button and you’ll see this page here.

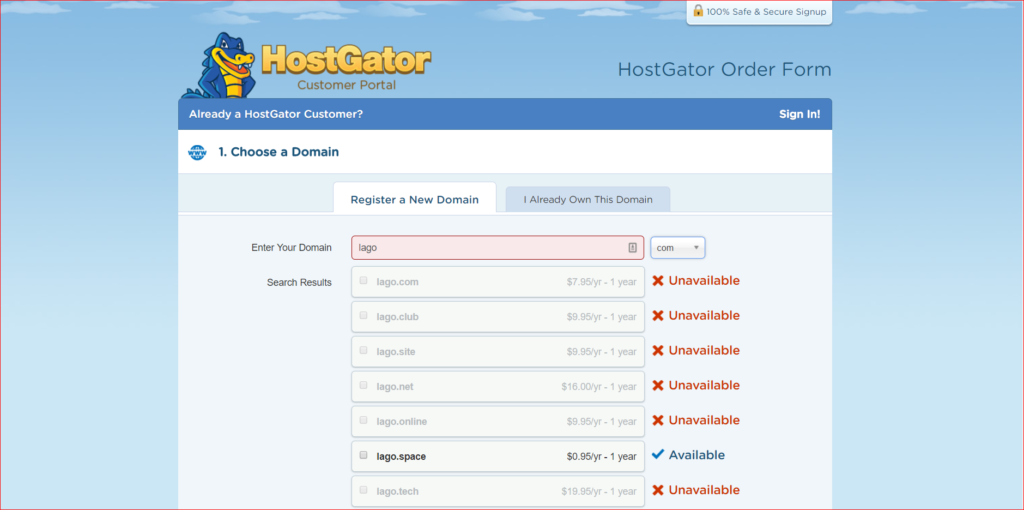
Well, there are two tabs. If you already own a domain, enter your domain in here. However, most of you will want to register a new domain and, in that case, enter your desired domain name in this field here.
Let’s try, in our case, for the demo purposes, I might register one called: lago.com. What it will do is check if the domain that you entered is available and, as you can see here, this one is unavailable.
Now, by the way, it’s not essential that you do purchase a .com. The .org/.net and all of those other extensions function are in exactly the same way, that .com functions and these other extensions will make no difference to set up your website. So, if you wanted to select any one of these other extensions then just do that, it won’t make any difference.
It’s just a personal preference that I choose a .com domain. It is just something that I personally like to do. So, this one is not available. Maybe I will choose or try and see if one called: lagodemo.com is available, and as you can see, this one is.
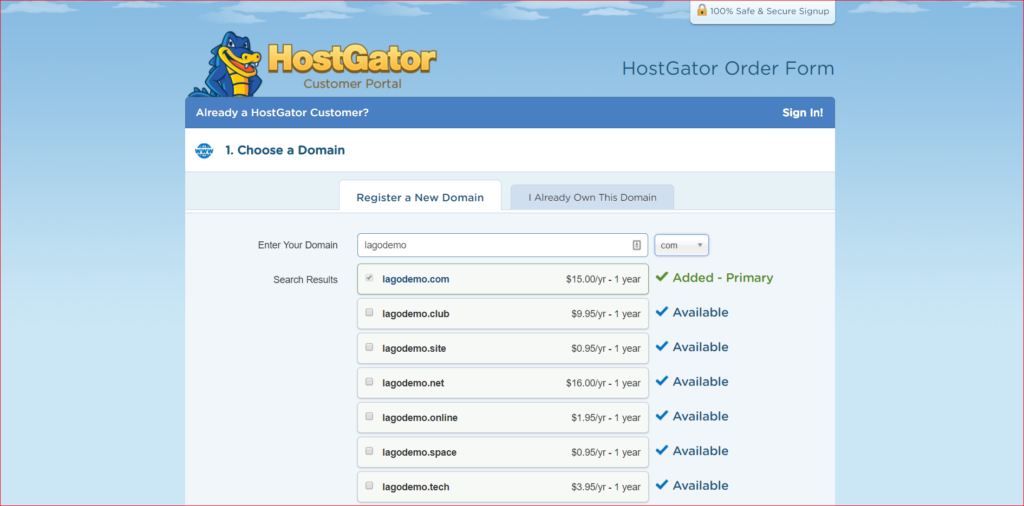
What it will do is when you’ve entered a domain that is available, it will add it to your shopping cart and then you can move on to the next step. You’ll notice that you’ve selected “hatching”, the billing cycle and you’ve got a few billing cycle options to choose from.
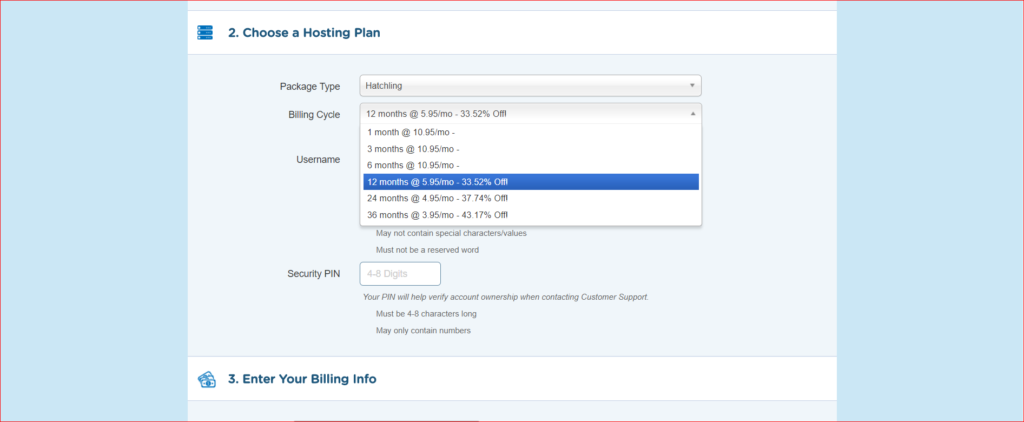
I will select the twelve-month options so I pay on one yearly basis and you’ll notice that it is 33.52% off. Wait a minute, I’m going to show you a coupon code to get a much bigger discount than the standard 33.52% off. So, for now, I’ll choose the twelve-month billing cycle. You can do the same, or you can also choose a monthly cycle just for a trial or any other billing cycles.
So, maybe you want to just see how this goes choose a one-month billing cycle, I will also give you a coupon code for that in a minute. For now, let’s choose twelve-month billing cycle.
Enter a username and security pin, then go down. I’ll skip this section temporarily,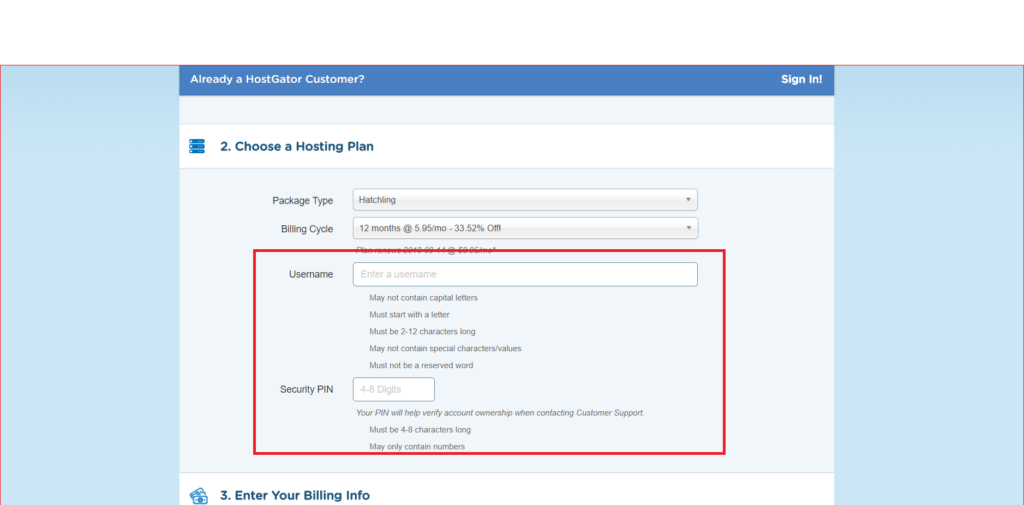
I’ll show you the other options. Now, in the section called additional services, I’d suggest you deselect any of the items that are automatically selected in this area. That’s just because they are not absolutely essential for you to start your website, you can deselect any of those upsells. Then go down and you’ll see a section where you’ve got the option of entering a coupon code, and it will show you the amount due.
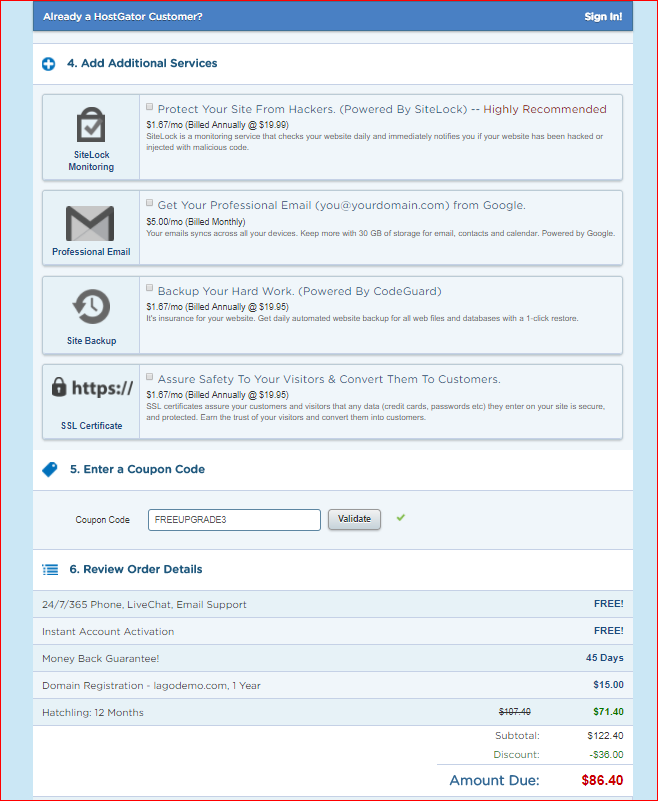
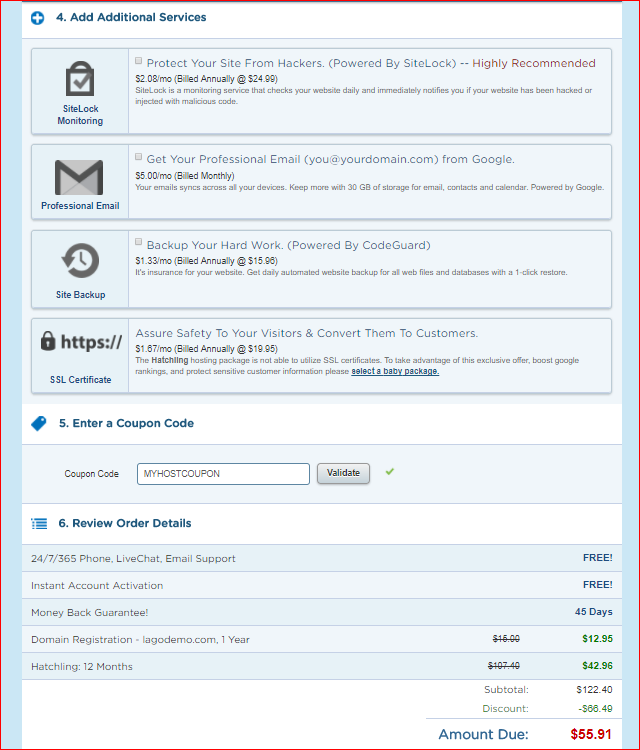
Now, keep in mind at the moment it is $86.4 this coupon code that will appear for you is the default 33.52% off. Using this coupon below instead:
MYHOSTCOUPON
, then click this ‘validate’ button over here and you’ll see this new amount due is less than it was with the default coupon code. That’s because this coupon code will always give you a bigger discount than the default that Hostgator gives you.
So, please take advantage of that. then go up and complete all of your billing details. As you see, you’ve got the option paying by credit card or PayPal, and I do not want to share my personal billing details and credit card details in public. So, feel free to follow along with instructions and fill up all the billing details and go on with the next steps.

(By the way, please make sure that the email address you enter in these fields are accurate because you will receive a confirmation email from Hostgator which will confirm your purchase and give you your new account details for you to login).
Now, go down and just ensure that everything looks right to you and, when you’re ready, tick this checkbox “Agree to the terms and conditions” and check out.
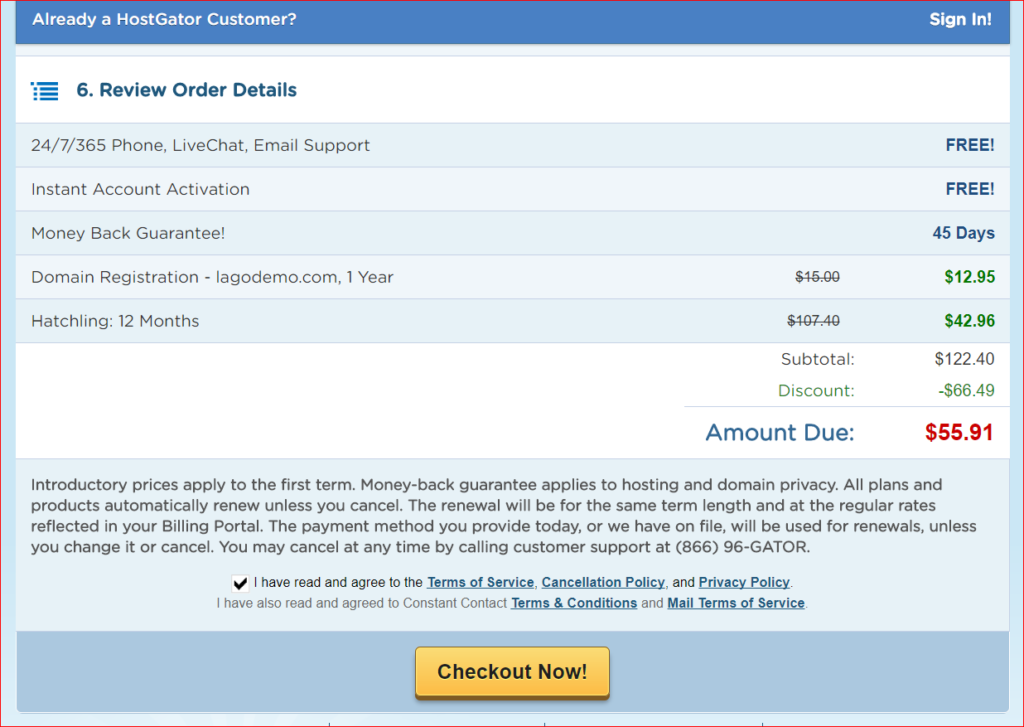
Next, you’ll receive this email from Hostgator confirming that you have successfully set up your new account, it will give you your account details such as your control panel link, your username, and password.
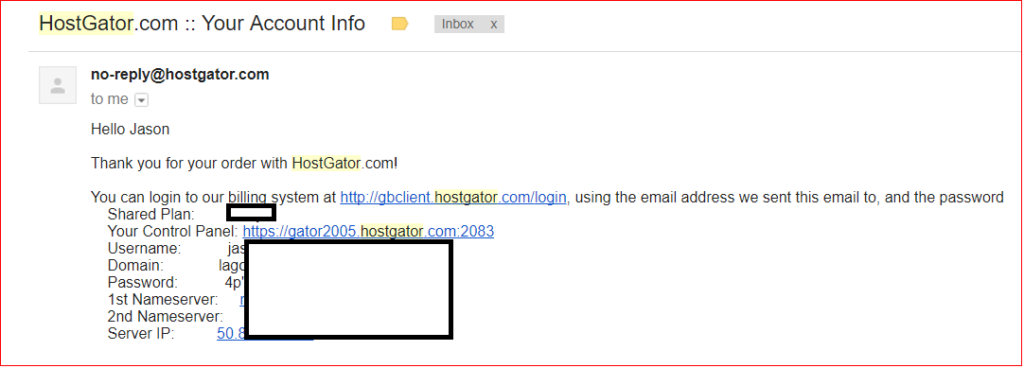
These are very important part of the information we’ll need to go ahead. By the way, if you haven’t already received this email from Hostgator within the next 10 to 15 minutes, just contact me and give me some of your details and I will assist you the best I can.
Install The WordPress Platform
The next step is to install the WordPress platform. To do that, we’ll need to access our control panel through this link here (as confirmation email). So, just ‘right click’ and open this link in a new tab.
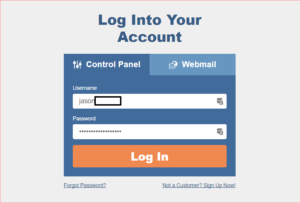
On this screen here enter the username and password that you’re given over here and you’ll be able to log into your dashboard. So, I’ll just copy and paste mine in. Just make sure that you do not leave any blanks before & after the username or password, otherwise, it will not allow you to enter your control panel.
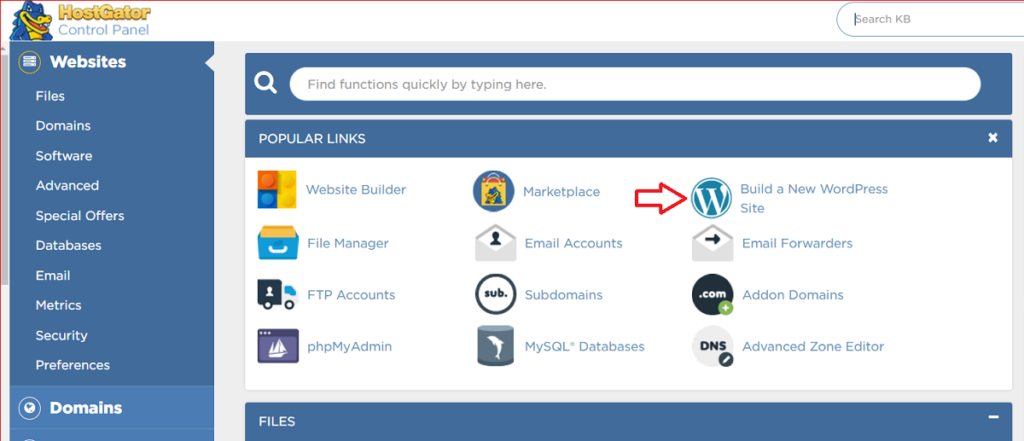
This is what your Hostgator control panel will look like and it’s not a section that you’ll access very often. In this occasion, all we need to do is install the WordPress platform.
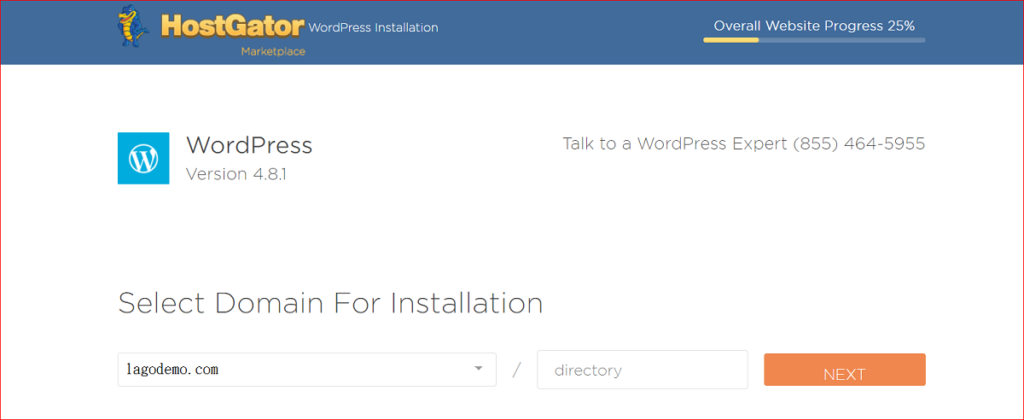
But for now, go up to the POPULAR LINKS field, there should be an icon button called Build A New WordPress Site. So click on that. Next, you should be able to see WordPress installation section. So, Select Domain For Installation through drop-down below menu, click NEXT button and go to the next step “Install Settings” section.
They give you a number of upsells which we don’t need. All we need to do is install the free version of WordPress.
Next, let’s put an admin email and make sure you put the correct login email address, perhaps your own personal email address, because you’ll be sent your login details to that email account and, if you for whatever reason misplace your password, you can request a new one and you’ll be sent that in your admin email.
Admin user it can be either ‘admin’ or you can have your own name. Enter your title of your website, whatever your website is about, and enter your first and last name.
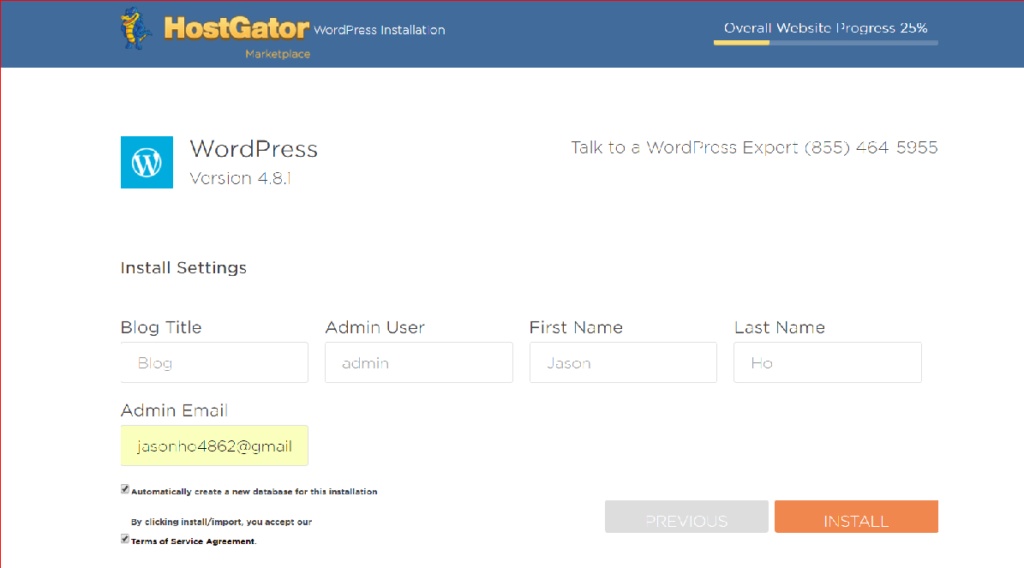
So, tick the checkbox “Terms of Service Agreement”, click on the “INSTALL” button, once it’s complete, you’ll see this notification here. Your installation is complete. Click here to view your details. Now, what I would do is just copy this and perhaps put it in a notepad, just temporarily.
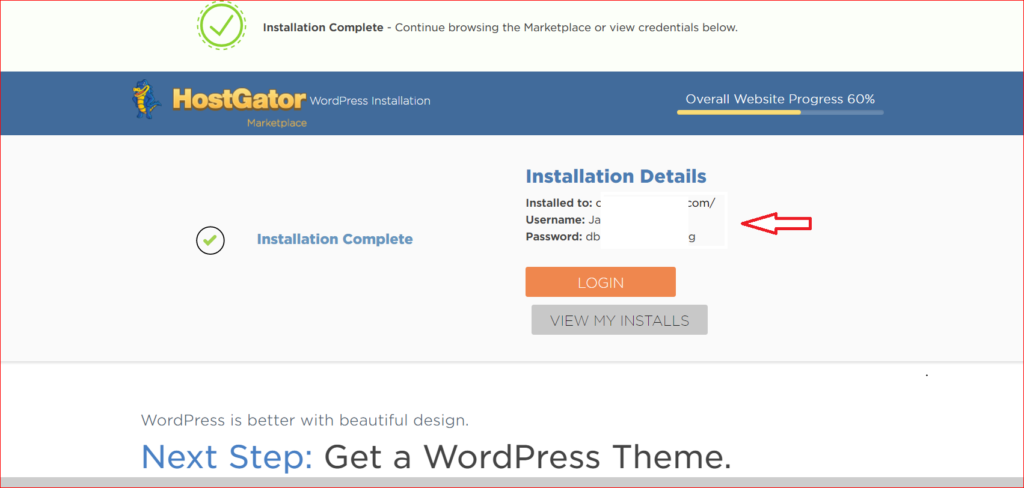
Ok, so this is our WordPress login URL. It’ll be domain.com/wp-admin. So, if I just right click that and open that in a new tab…just know that sometimes it can take between about 15 to 20 minutes for this page to activate and load.
(If it doesn’t load for you, just come back in, say 10 to 15 minutes, try again if it’s still not loading, come back in half an hour or an hour and go to this URL: hold down CTRL and F5 on your keyboard and it will refresh this page. If you’re on a Mac hold down command and F5.)
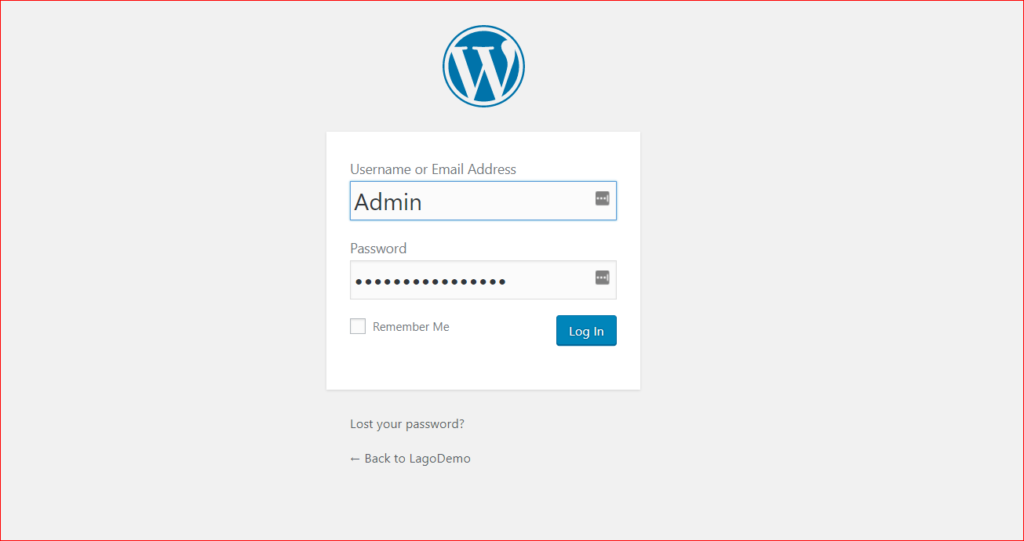
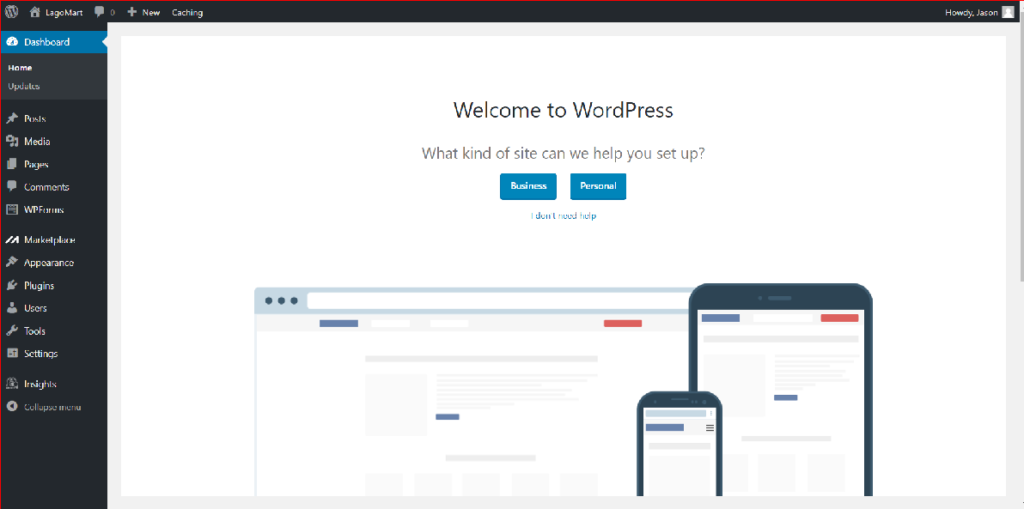
There you go! That is what your login page should look like. Now, this is known as your WordPress dashboard or WordPress admin login and you’ll need to access this page anytime you want to make any changes to your website.
Ok, so… the next thing to do is just get your username and password, perhaps just copy and paste and then click the Log In button. If you come across any issues like this and you’re not seeing the WordPress dashboard, please get in touch with Hostgator through the live chat and they will help you out.
So, welcome guys! This is your WordPress dashboard. Basically, it’s the engine behind your entire website.
The very first thing that I highly recommend you to do is change your password because you will probably notice that this password that WordPress gives you by default is not very memorable and there’s no chance that you will be able to remember that.
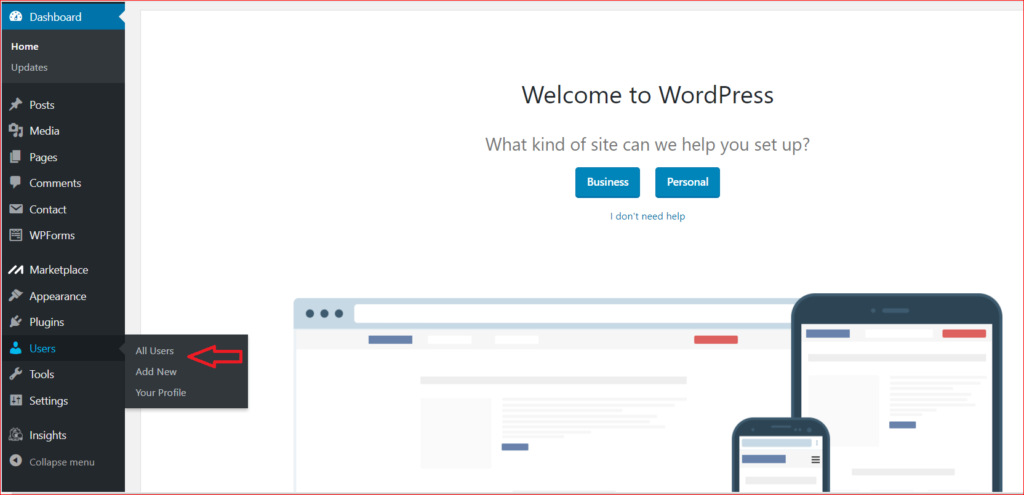
So, to change your password, go and hover over the Users tab and actually, just click on the “All Users” tab, then click on your username. Down the bottom, you should see two fields for entering your new password. So, just enter your new password in there and repeat that and then click on the Update Profile button at the bottom. All done!
So what that’s done is replace the default password on our WordPress admin login page, please do keep those details handy. You will need to log into this dashboard anytime if you want to make a change to your website.
Now that we’ve done that, the next thing I want to do is install the website design.
So, on the left-hand side column, just hover over Appearance and click on Themes. Now, for WordPress, a theme is basically a design we’re going to use if you want to look through the WordPress theme library and install anyone that you want and a lot of them are actually free. So, by clicking on this link here you’ll be able to see a number of themes that you can install and start configuring.
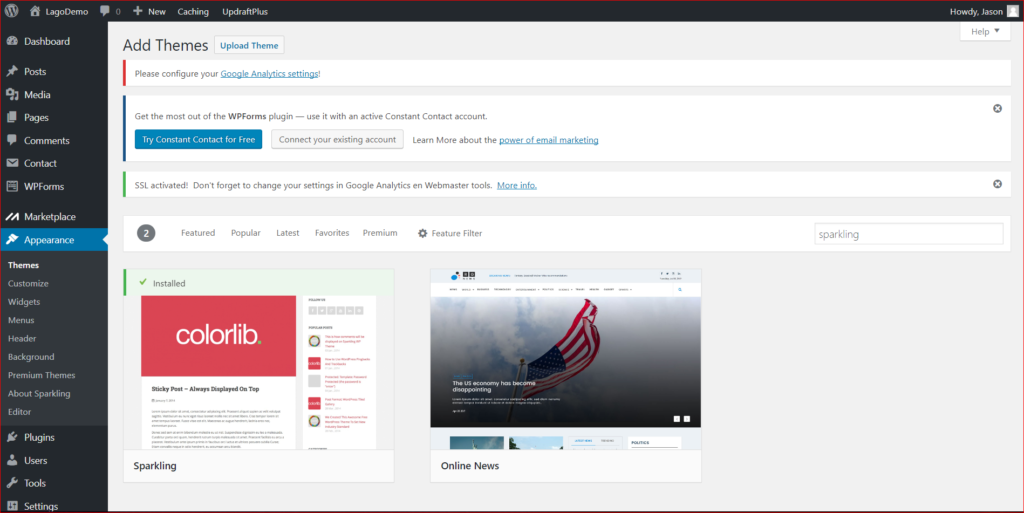
We are going to be using a theme called Sparkling. What I will do to make things easy for you click the button “Add New”, type “sparkling” in “Search themes… “ column to find this particular theme. Then click on “Install” button to install this theme for your website.
It may take a few seconds, so, be patient. Once that’s done it will give you a successful notification and then click on the Activate button. That’s all done.
Now, you may be excited to know that your website is already live. Let’s go ahead and complete setup of this website.
- Go down to ‘Settings’ and click on ‘General’. You can actually change the site title, You can change that if you like, remove anything in the Tagline then go down and click on Save Changes. This will actually prompt you to log in again.
- Again, hover over “Settings” and go to “Permalinks”. Currently, when you make a post on your website, it will give you a URL that looks like very long and tedious. So, let’s change to “Post name”. So any post you make will be cleaner and much simpler for the users as well as search engines. So, click on that posting, go down and save the change.
- If you go to “Pages”, you’ll notice that there’s a sample page that’s automatically created for your reference. So there’s a ‘hello world’ sample post. You may delete any of those and move to trash, then create new pages for your content. And that’s all you need to do for configuring your initial settings for WordPress. So, as you can see, I just Add New, then create 4 pages: “Home”,”Blog”,”About”, and ”Contact”. Please don’t forget to click “Publish” button once you type in the new pages.
- Hover over “Setting”, click on “Reading”, adjust your “Front page displays” to “A static page(select below)”, select your Frontpage to “Home”, and your Posts page to “Blog”, go down the bottom and save.
- Hover over “Appearance”, click on “Menus”, and create a new menu, type in whatever name you like. I just type in “Menu”, and click the “Create Menu” button, then tick the page you want to display Primary Menu or Footer on the screen. You may Drag each item into the order you prefer. Don’t forget to tick the checkbox “Primary Menu” and “Footer Links” and save.
- Let’s start adding content to the pages. Hover over “Pages”=> click on “All Pages”=>hover over “Home” page=>click on “Edit”. The screen will display a content editor, you may hover over the icons, and get its functions. One more thing before we get started. This editor here is a visual editor. Whenever you’re in the visual tab you’ll see all these options available and, just like Microsoft Word, what you see is what you get. And if you’re in the text tab, you’ll be seeing all the code. So, anytime you need to enter any code, we’ll be entering it in the text tab. We can actually add a nice big image and to do that go down to ‘Set Featured Image‘. You’ll be able to select and upload the file or be able to drag and drop files onto this page, and stored in your media library and that will remain there. So, let’s set that as a featured image and then let’s update and refresh the page. If you want to add any images throughout to your articles, you can do that through ‘add media’. When you click on ‘add media’ you can choose from your media library. Note: You may click this link to get free images https://pixabay.com. Don’t forget to click “Publish” or “Update” button once you make any content change, then click “View Page” to check the screen display.
- Add a contact form to “Contact” page. Go to the left sidebar, hover over “Plugins”=> click on “Add New”=>type keyword “Contact Form 7” into “Search plugins” column. You will find the plugin, then just click the “Install Now” button, and “Create” it. Go to left sidebar again, hover over “Contact”=> click on “Add New”=>hover over “Contact form 1” page=>click on “Edit”. If you won’t make any change, you may just copy the shortcode and paste on your “Contact” page. This is your first “plugin installation” process, you may constantly use for future need.
- Start Your first post. Hover over “Posts”=> click on “Add New”=> Enter your title’. Start editing your post, the editing process is almost the same as editing a page… If you just want to publish some excerpts before the visitors click “Read More” button, then hover over “Appearance”=> click on “Customize” =>”Sparkling Options” =>”Content Options” => click on “Show post excerpts?” button and done.
Now if you follow the mentioned above step by step, your website is live to go!

Some Free WordPress plugins are highly recommended to install
There are more than tens of thousands of different FREE plugins you can find in wordpress.org, and installation is easy – just go to WordPress dashboard, hover over “Plugins -> Add New” and start searching.
The plugins below are highly recommended to install:
[+] Wordfence Security – with functions of Anti-virus, Firewall, and Malware Scan. Protect your websites with the best security available
[+] Yoast SEO for WordPress– make your WordPress site more SEO-friendly, take care of all the technical optimization, help you write better content.
[+]Google Analytics by MonsterInsights -allow you to connect your WordPress website with Google Analytics, so you can see how visitors find and use your website.
[+]UpdraftPlus WordPress Backup Plugin– This plugin can backup your website. If anything (such as server crashes, hacking, security flaws, bad plugin or theme updates and insecure web hosts) happened to your website, it would cost you dearly in time, money and reputation. backups are the ultimate insurance.
The related links for reference…
[+] How to build an e-commerce store website
[+] How to build a membership website
[+] How To Get Your Website A SSL Certificate
[+] Set Up A Self-Hosting Autoresponder with A WordPress Plugin without Paying Monthly Fees
A quick note about the reviews on this site: I am an affiliate marketer, reviewing some vendor’s products. The venders of these products gave me free of charge for me to test them. However, all my reviews are done as honestly as possible and I am not making any commitment to the vendor before doing my reviews. If you click on the link on this website to take you to the paid product, this link will be an affiliate link and I will be paid a percentage of the sales price should you decide to purchase that product.
I have learn several just right stuff here. Certainly price bookmarking for revisiting.
I wonder how so much attempt you set to create this sort of wonderful
informative website.
Thank you for your comment, just share what people may be interested.
I love it when individuals get together and share views.
Great blog, keep it up!
Thank you for your comment
Appreciate this post. Let me try it out.
Hi my family member! I want to say that this article is awesome,
nice written and come with approximately all important infos.
I’d like to peer extra posts like this .
I’ve been surfing online more than three hours today, yet I never found any interesting
article like yours. It is pretty worth enough for me.
Personally, if all site owners and bloggers made good content as you did,
the web will be much more useful than ever before.
Thank you for your comment.
I like the article
I spent a great deal of time to find something
like this
Thanks to the terrific guide
I spent a great deal of time to find something such as this
Thank you for the excellent post
This is really helpful, thanks.
Thanks, it is quite informative
It works very well for me
Thank you for the excellent article
Thanks to the terrific guide
I spent a lot of time to locate something like this